Welcome to the Lux Thermostat User Manual! This guide provides essential information for installing‚ operating‚ and customizing your Lux thermostat for optimal performance and energy efficiency.
Overview of the Lux Thermostat Series
The Lux Thermostat Series offers a range of innovative‚ energy-efficient solutions for controlling home and commercial environments. Designed for compatibility with various heating and cooling systems‚ these thermostats provide precise temperature management. Models like the LuxPro PSD010B and TX9600TS feature programmable settings‚ smart home integration‚ and user-friendly interfaces. Whether you prefer mechanical‚ programmable‚ or Wi-Fi-enabled options‚ Lux thermostats cater to diverse needs. Their advanced features include energy-saving modes‚ scheduling capabilities‚ and remote access via smartphones. With a focus on simplicity and functionality‚ the Lux Thermostat Series ensures comfort and efficiency in any setting.

Importance of Reading the User Manual
Reading the Lux Thermostat User Manual is crucial for understanding installation‚ operation‚ and customization. It ensures proper setup‚ avoiding potential damage to the thermostat or HVAC system. The manual provides step-by-step guides for programming modes‚ temperature scheduling‚ and troubleshooting common issues like error codes or connectivity problems. By following the instructions‚ users can optimize energy efficiency‚ customize settings‚ and maintain optimal performance. Additionally‚ the manual highlights safety precautions and warranty information‚ ensuring compliance with manufacturer guidelines. Consulting the manual before installation or adjustments is essential for maximizing functionality and longevity of the device.

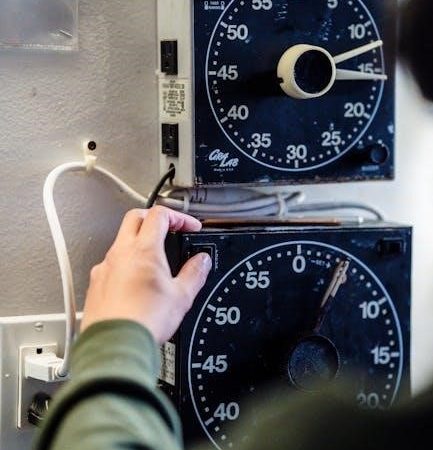
Installation and Setup
Turn OFF the electricity to all heating and cooling components. Remove the front portion of your old thermostat and follow the step-by-step installation procedures carefully.
Pre-Installation Requirements
Before installing your Lux thermostat‚ ensure the following:
- Turn off the power supply to your HVAC system at the circuit breaker.
- Verify compatibility with your heating and cooling system (e.g.‚ 24V‚ heat pumps‚ or electric systems).
- Gather necessary tools‚ such as screwdrivers‚ wire strippers‚ and a level.
- Ensure the installation location is accessible and clear of obstructions.
- Read the manual thoroughly to understand the installation process.
- Consult a licensed HVAC technician or electrician if you are unsure about any step.
Step-by-Step Installation Guide
Turn off the power to your HVAC system at the circuit breaker.

Remove the old thermostat and label the wires for identification.
Mount the new Lux thermostat base to the wall‚ ensuring it is level.

Connect the wires to the appropriate terminals‚ matching the labels from your old thermostat.
Gently push the thermostat into place‚ ensuring it clicks securely onto the base.
Turn the power back on and test the system to ensure proper operation.
Program your desired settings‚ such as temperature schedules‚ using the thermostat’s interface.
Wiring Diagrams and Terminal Connections
Understanding the wiring diagrams and terminal connections is crucial for proper installation. The Lux thermostat typically uses standard terminals such as R (24V power)‚ W (heating)‚ Y (cooling)‚ C (common)‚ and G (fan). Refer to the provided wiring diagram in the manual to match your system’s configuration. Ensure all wires are securely connected to the correct terminals to avoid malfunction. For heat-only systems‚ the C terminal may not be required. If you have a heat pump‚ verify the specific terminal assignments. Always turn off the power to your HVAC system before handling wires to prevent electrical hazards. Consult the manual for model-specific wiring details.

Programming and Operation
Program your Lux thermostat with ease‚ utilizing 5/2-day or 7-day scheduling. Set energy-saving modes and customize temperature settings for optimal comfort and efficiency year-round.

Understanding the Programming Modes
The Lux thermostat offers versatile programming modes to suit your lifestyle. The 5/2-day mode allows separate schedules for weekdays and weekends‚ while the 7-day mode provides daily customization. Energy-saving settings automatically adjust temperatures during peak hours or when the house is unoccupied. Manual override lets you temporarily adjust settings without altering the main program. These modes ensure comfort and efficiency‚ adapting to your routine seamlessly. Refer to your model’s manual for specific mode details and customization options to optimize your home’s climate control effectively.
Setting Temperature Schedules

Setting temperature schedules on your Lux thermostat ensures consistent comfort while optimizing energy use. Use the touchscreen or buttons to navigate to the scheduling menu. Select your preferred mode (5/2-day‚ 7-day‚ or energy-saving) and choose specific time periods. Adjust the temperature for each interval‚ such as cooler during sleep or away times and warmer when active. Save your settings to apply the schedule. For detailed instructions‚ refer to your model’s user manual‚ which provides step-by-step guidance for customizing schedules based on your lifestyle and preferences.
Manual Temperature Adjustment
Manual temperature adjustment on your Lux thermostat allows for quick‚ temporary changes without altering your programmed schedule. Simply touch the screen or press the buttons to override the current setting. Use the up or down arrows to select your desired temperature. This feature is ideal for unexpected changes in occupancy or comfort needs. Note that manual adjustments will not affect your programmed schedule unless you save the changes. For extended overrides‚ some models offer a “hold” option to maintain the manual temperature until the next scheduled period. Always refer to your specific model’s manual for detailed instructions on manual adjustments and hold functions.

Troubleshooting Common Issues
Troubleshooting your Lux thermostat? Start by checking error codes or blinking displays for clues. Restart the device or verify wiring connections. Consult the manual for specific solutions.
Identifying Error Codes and Blinking Displays
Identifying error codes and blinking displays on your Lux thermostat is crucial for quick troubleshooting. Error codes often appear as alphanumeric messages‚ while blinking displays indicate specific issues like power interruptions or connectivity problems. Refer to your user manual to decode these codes‚ as they provide detailed explanations for each error; Common issues include “T” or “OL” codes‚ which may signal temperature sensor malfunctions or system overloads. Blinking displays can also indicate low battery levels or communication errors with smart home systems. Always restart the thermostat and check wiring connections before seeking advanced troubleshooting steps. This section helps you diagnose and resolve issues efficiently.
Resolving Connectivity Problems
Resolving connectivity issues with your Lux thermostat involves a few straightforward steps. First‚ ensure your thermostat is connected to the correct Wi-Fi network. Restart your router and thermostat to refresh the connection. If issues persist‚ check your network password or confirm that your router is functioning properly. For smart models‚ verify that your Lux thermostat is linked to your smart home system. If problems remain‚ reset the thermostat to factory settings and reconfigure it. Refer to your user manual for specific instructions‚ as different models may have varying procedures. Addressing connectivity problems promptly ensures seamless operation and energy management. Always consult the manual for model-specific guidance.
Power Supply and Restart Procedures
Ensuring a stable power supply is crucial for your Lux thermostat’s operation. Verify that the thermostat is receiving the correct voltage as specified in the manual. If the display blinks or malfunctions‚ check for power interruptions or loose wiring. To restart‚ switch off the power at the circuit breaker‚ wait 30 seconds‚ and restore power. For smart models‚ a factory reset may be necessary‚ which can be done through the menu settings. Always follow the restart procedure outlined in your specific model’s manual to avoid configuration loss. Proper power management ensures reliable performance and maintains your programmed settings for consistent temperature control and energy efficiency.

Advanced Features and Customization
Explore smart home integration‚ energy-saving modes‚ and display customization to tailor your Lux thermostat experience for enhanced comfort and efficiency.
Smart Home Integration
The Lux thermostat seamlessly integrates with popular smart home systems‚ allowing voice control through platforms like Amazon Alexa and Google Home. Users can remotely adjust settings‚ monitor energy usage‚ and receive notifications through the Lux app. Wi-Fi connectivity enables scheduling and geofencing‚ optimizing comfort and energy savings. For advanced setups‚ professional installation may be required. Ensure your router supports the thermostat’s connectivity needs. Refer to the user manual for detailed pairing instructions and troubleshooting tips to ensure a smooth integration experience. This feature enhances convenience and efficiency‚ making it easier to manage your home’s climate from anywhere.
Energy-Saving Settings
The Lux thermostat offers advanced energy-saving features designed to reduce your energy consumption. Program schedules to align with your daily routine‚ and use geofencing to adjust temperatures based on your location. The thermostat also includes an energy-saving mode that learns your preferences to optimize heating and cooling. Additionally‚ it provides detailed energy usage reports to help you identify areas for improvement. Eco-friendly settings‚ such as temperature limits‚ prevent excessive energy use while maintaining comfort. These features work seamlessly with smart home systems‚ ensuring your home stays efficient and comfortable year-round. By utilizing these settings‚ you can significantly lower your utility bills and environmental impact.
Customizing Display and Controls
The Lux thermostat allows you to customize its display and controls to suit your preferences. Adjust the screen brightness‚ choose from multiple color themes‚ and set up a lockout feature to prevent unauthorized changes. The intuitive interface enables easy navigation through menus‚ while the touch screen provides quick access to settings. Customize the display layout to prioritize frequently used features‚ such as temperature‚ schedules‚ or energy usage. You can also program custom themes for different times of the day‚ ensuring a seamless user experience. These customization options enhance both functionality and convenience‚ making your thermostat tailored to your lifestyle and needs.