
Brother P-touch D200 Manual: A Comprehensive Guide
This comprehensive guide details the Brother P-touch PT-D200 label maker, covering setup, operation, troubleshooting, and genuine tape usage for optimal performance.
The Brother P-touch PT-D200 is a versatile and user-friendly label maker designed for home and office use. This device empowers you to create professional-looking, durable labels for a multitude of applications, from organizing files and folders to identifying cables and creating address labels.
Its compact design and intuitive controls make it accessible for users of all technical skill levels. The PT-D200 offers a range of fonts, styles, and symbols, allowing for customized label creation. This manual provides a detailed walkthrough of the printer’s features, ensuring you maximize its capabilities.
What’s Included in the Box
Upon opening your Brother P-touch PT-D200 package, you’ll find several key components. These include the PT-D200 label printer itself, a standard-length TZe tape cassette for immediate use, and this comprehensive instruction manual to guide you through setup and operation.
Additionally, the box contains a USB cable for connecting to your computer, enabling advanced label design and printing options. Please verify that all listed items are present. If anything is missing or damaged, contact Brother customer support immediately for assistance. Retain the original packaging for potential future needs.
Key Features and Benefits
The Brother P-touch PT-D200 offers a versatile labeling solution for home, office, and beyond. Key features include a QWERTY keyboard for efficient text entry, a high-resolution print engine delivering crisp, clear labels, and a variety of built-in fonts, symbols, and frames.
Benefit from its user-friendly interface, allowing quick label creation and editing. The PT-D200 supports multiple tape widths and colors, enhancing organization. Its compatibility with Brother iPrint&Scan enables mobile printing. Enjoy professional-quality labels with ease and convenience.
Setting Up Your P-touch D200
Proper setup ensures optimal performance. This section guides you through initial power-on, battery installation, and correctly loading a TZe tape cassette into your device.
Initial Setup and Powering On
Getting started with your Brother P-touch D200 is straightforward. First, remove the protective film from the display screen. Then, ensure the device is off before proceeding. The P-touch D200 can operate on either AC adapter power or batteries. If using batteries, refer to the next section for installation instructions.
To power on the device, simply press the power button located on the side. The display screen will illuminate, and the printer will perform a self-test. If the self-test completes successfully, you are ready to begin creating labels. If any errors are displayed, consult the troubleshooting section of this manual.
Installing the Batteries
To install batteries into your Brother P-touch D200, locate the battery compartment on the bottom of the unit. Gently slide the battery cover open. Insert six AAA-sized alkaline batteries, ensuring correct polarity as indicated by the markings inside the compartment (+ and -). Incorrect battery installation will prevent the printer from powering on.
Once the batteries are securely in place, slide the battery cover back on until it clicks shut. The P-touch D200 will now operate on battery power. Note that battery life will vary depending on usage. Consider using the AC adapter for extended printing sessions.
Loading the TZe Tape Cassette
To load a TZe tape cassette into your Brother P-touch D200, lift the label guide lever located on the side of the printer. Then, open the tape compartment cover. Insert the TZe tape cassette into the compartment, ensuring the tape spools freely. Close the tape compartment cover until it clicks securely.
Finally, gently lower the label guide lever to secure the tape in place. The printer is now ready to detect the tape and begin printing. Always use genuine Brother TZe tapes for optimal print quality and to avoid damaging the printer mechanism.

Understanding the Control Panel
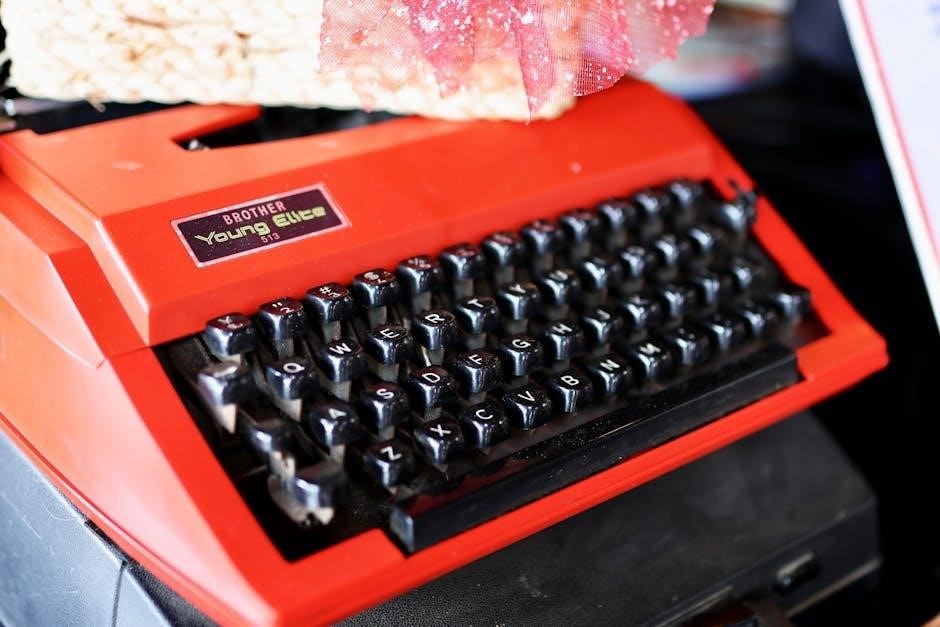
The Brother P-touch D200’s control panel features a keyboard, display screen, and navigation buttons for easy label creation and editing, offering intuitive operation.
Keyboard Layout and Functions
The Brother P-touch D200 keyboard is designed for efficient label creation. It includes alphanumeric keys for text input, along with dedicated function keys for formatting and editing. These keys allow users to quickly adjust font styles, sizes, and add symbols.
The ‘Print Preview’ key lets you visualize the label before printing, preventing errors. ‘Start/Stop’ initiates printing or halts the process. The ‘Clear’ key erases entered text, while ‘Backspace’ removes individual characters. The ‘Shift’ key accesses secondary functions printed on the keys.
Understanding each key’s function is crucial for maximizing the P-touch D200’s capabilities and creating professional-looking labels with ease.
Display Screen Indicators
The Brother P-touch D200’s LCD display provides vital information during label creation. Key indicators include a ‘Tape Type’ icon, confirming the loaded tape cassette. A ‘Print Preview’ symbol shows the label’s appearance before printing.
Battery level is indicated by an icon, alerting you to low power. The ‘Error’ indicator signals issues like tape jams or printer malfunctions. ‘Font Style’ and ‘Font Size’ icons display current settings.
Understanding these indicators ensures smooth operation and helps troubleshoot potential problems quickly. The display clearly communicates the printer’s status, allowing for efficient label production.
Navigation Buttons
The Brother P-touch D200 utilizes intuitive navigation buttons for easy operation. The ‘Back/Clear’ button cancels actions and deletes characters. ‘Print’ initiates label printing, while ‘Preview’ displays the label layout.
Arrow keys (Up/Down/Left/Right) navigate menus, scroll through text, and adjust settings. ‘Shift’ accesses alternate characters and functions. The ‘Enter’ button confirms selections and saves changes.
Mastering these buttons allows seamless text entry, font adjustments, and overall control of the label maker. Familiarizing yourself with their functions streamlines the label creation process, enhancing efficiency.
Creating and Editing Labels
This section guides you through entering text, selecting fonts and sizes, and adding symbols or frames to personalize your Brother P-touch labels effectively.
Entering Text and Numbers
The Brother P-touch D200 allows for easy text and number input using its QWERTY keyboard. Begin by pressing the ‘Alpha-Numeric’ key to activate text entry mode. You can then type directly on the keyboard, utilizing the ‘Shift’ key for uppercase letters and symbols.
To switch between alphanumeric and numeric input, press the ‘A/N’ key. This ensures accurate data entry for various labeling needs. The display screen clearly shows your input as you type. Utilize the ‘Space’ key to create gaps between words and the ‘Backspace’ key to correct any errors during text creation. Remember to confirm your input before printing for optimal results.
Font Styles and Sizes
The Brother P-touch D200 offers a variety of font styles and sizes to customize your labels. Access font options by pressing the ‘Style’ key, cycling through available fonts like Arial, Helvetica, and more. Adjust font size using the ‘Size’ key, selecting from predefined options to achieve the desired label appearance.
Experiment with bold, italic, and underlined text using the corresponding style keys. Preview your selections on the display screen to ensure readability and visual appeal. Combining different fonts and sizes can enhance label clarity and organization, making your labels more effective and professional-looking.
Adding Symbols and Frames
Enhance your labels with the Brother P-touch D200’s built-in symbol library! Press the ‘Symbol’ key to access a range of icons and characters, perfect for visually representing content or adding emphasis. Navigate through categories to find the ideal symbol for your needs.
Further customize labels with decorative frames. Select from various frame styles using the ‘Frame’ key, adding a border around your text for increased visibility or aesthetic appeal. Experiment with different combinations of symbols and frames to create unique and eye-catching labels that stand out.

Printing Labels with the D200
Achieve professional results by selecting appropriate label sizes and types, then adjusting print quality settings on your Brother P-touch D200 for optimal clarity.
Selecting Label Size and Type
The Brother P-touch D200 supports a variety of TZe tape widths, ranging from 3.5mm to 18mm, allowing for diverse labeling applications. Before printing, carefully consider the surface you’re labeling and the amount of text needed.
Navigate the printer’s menu to choose the desired tape width. The display will show compatible label lengths. Selecting the correct size ensures proper formatting and prevents wasted tape. Different tape types, like laminated or non-laminated, offer varying durability and resistance to environmental factors.
For outdoor use or harsh conditions, laminated tapes are recommended. Experiment with different sizes to find the best fit for your specific labeling needs, ensuring readability and a professional finish.
Adjusting Print Quality
The Brother P-touch D200 offers options to fine-tune print quality for optimal readability and appearance. While not extensively adjustable, you can influence the darkness and density of the print. Access the print settings menu via the control panel to explore these options.
Increasing the print density results in darker, bolder text, ideal for labels requiring high visibility. However, excessive density may lead to smudging or reduced tape adhesion. Conversely, lower density creates lighter text, conserving tape but potentially sacrificing clarity.
Experiment with different settings to achieve the best balance between print quality and tape usage for your specific labeling task.
Cutting and Dispensing Labels
The Brother P-touch D200 simplifies label cutting and dispensing. After printing, use the auto-cut function by pressing the dedicated cut button. This cleanly separates the label from the tape. For manual cutting, a slider is available for precise adjustments.
To dispense labels, gently pull the desired length of tape. The printer automatically advances the tape for the next label. Ensure a smooth pull to avoid tearing or jamming. Regularly inspect the cutter blade for sharpness; a dull blade can cause ragged edges.
Proper cutting and dispensing ensure professional-looking, easily peelable labels.
Connectivity and Software
The Brother P-touch D200 offers Brother iPrint&Scan compatibility for mobile printing, alongside a full driver and software package for PC/Mac.
Brother iPrint&Scan Compatibility
Brother iPrint&Scan significantly expands the functionality of your P-touch D200, enabling seamless label creation and printing directly from your smartphone or tablet. This free mobile application, available for both iOS and Android devices, allows you to design labels on the go, utilizing pre-designed templates or creating custom designs with ease.
You can effortlessly import images and logos, adjust font styles and sizes, and preview your labels before printing. Brother iPrint&Scan also provides access to scanning functionality, offering a versatile solution for various labeling needs. Clicking the provided link offers instructions for downloading and installing the application for your Windows or Macintosh operating system, enhancing your labeling experience.
Full Driver and Software Package Installation
To unlock the full potential of your Brother P-touch D200, installing the complete driver and software package is crucial. The installation process is designed to be straightforward; simply initiate the download and allow the installation screens to progress sequentially. Brother strongly advises against canceling any screen during this process, as interruption could lead to incomplete installation and functionality issues.
For wireless users, ensure your machine is connected to a wireless network before beginning. The installation may take several moments to complete, but provides enhanced features and customization options beyond basic label creation. Following these steps guarantees optimal performance and access to all available features.
Wireless Network Connection (Infrastructure)
Connecting your Brother P-touch D200 to an infrastructure wireless network expands its functionality, enabling features like mobile printing and remote control. To begin, access the printer’s settings menu and navigate to the wireless network setup section. Select your network from the available list and enter the correct password when prompted.
Ensure your network is functioning correctly and the printer is within range of the wireless signal. Successful connection allows seamless integration with Brother iPrint&Scan, offering convenient label creation and management from your smartphone or computer.

Troubleshooting Common Issues
This section provides solutions for frequent problems like tape jams, power failures, and connectivity issues, ensuring your Brother P-touch D200 operates smoothly.
Tape Jams and Errors
Tape jams are a common issue, often occurring during label ejection. First, power off the P-touch D200. Gently open the tape compartment and carefully remove any jammed tape fragments, avoiding any forceful pulling. Ensure the tape cassette is correctly installed and that the tape guides are clean.
If an error message appears on the display, consult the manual for specific error codes and their meanings; Restarting the printer often resolves minor errors. Regularly inspect the tape cassette for damage or debris. Using genuine Brother TZe tapes minimizes the risk of jams and ensures optimal print quality. Avoid touching the tape sensor during the process.
Printer Not Powering On
If your Brother P-touch D200 fails to power on, first verify the batteries are correctly installed with the proper polarity, or that the AC adapter is securely connected. Try replacing the batteries with a fresh set, even if the existing ones seem partially charged. Inspect the battery compartment for any corrosion or debris that might impede contact.
Ensure the power outlet is functioning correctly by testing it with another device. If using the AC adapter, confirm it’s the correct voltage for your region. A faulty adapter can prevent power-up. Consult the manual for specific troubleshooting steps.
Connectivity Problems
Experiencing connectivity issues with your Brother P-touch D200? First, confirm your wireless network is functioning correctly and that the printer is within range. Double-check the network password entered during setup, ensuring accuracy. Refer to the manual for detailed instructions on connecting to both infrastructure and ad-hoc wireless networks.
If using Brother iPrint&Scan, verify it’s the latest version. Restart both the printer and your mobile device. For persistent problems, try resetting the network settings on the D200 and re-establishing the connection.

Genuine Brother TZe Tapes
Brother recommends using only genuine TZe tapes with your PT-D200 for optimal print quality, durability, and to prevent potential printer damage.
Importance of Using Genuine Tapes
Genuine Brother TZe tapes are engineered specifically for P-touch label printers, like the PT-D200, ensuring consistent, high-quality results. Utilizing non-genuine tapes can lead to diminished print clarity, adhesive failures, and even potential damage to the printer’s internal mechanisms.
Brother meticulously tests its tapes for durability, resistance to fading, and long-lasting adhesion. Off-brand alternatives often lack these crucial qualities, resulting in labels that peel, crack, or become illegible over time. Furthermore, using unauthorized tapes may void your printer’s warranty. Invest in genuine Brother tapes to protect your investment and guarantee professional-looking labels.
Available TZe Tape Options
Brother offers a diverse range of TZe tape options for the PT-D200, catering to various labeling needs. These include standard polyester tapes in numerous colors – black on white, white on black, and vibrant hues like red, blue, and yellow.
Specialty tapes are also available, such as laminated tapes for enhanced durability, flexible ID tapes for curved surfaces, and extra-strong adhesive tapes for challenging materials. Tape widths range from 3.5mm to 24mm, allowing for customized label sizes. Explore metallic and patterned tapes for unique, eye-catching labels. Find the perfect TZe tape to suit your specific application!
Where to Purchase TZe Tapes
Genuine Brother TZe tapes for your PT-D200 are readily available through multiple channels. Brother’s official website (brother-usa.com) offers a complete selection and direct purchase options. You can also find TZe tapes at major office supply retailers like Staples, Office Depot, and Amazon.
Additionally, many Brother authorized resellers and local stationery stores stock a variety of TZe tape options. When purchasing, ensure authenticity to guarantee optimal printer performance and label durability. Avoid non-genuine tapes, as they may damage your P-touch and void the warranty.

Safety Precautions and Maintenance
Brother advises following all safety instructions within this manual to prevent accidents or damage. Regularly clean the PT-D200 and operate it within recommended temperatures.
Important Safety Instructions
Always read and understand all instructions before operating the Brother P-touch PT-D200. To reduce the risk of fire, electric shock, or injury, adhere to these precautions. Do not use the label maker near water or expose it to extreme temperatures.
Never attempt to disassemble or repair the PT-D200 yourself; contact qualified service personnel for assistance. Use only specified Brother accessories and tapes. Improper use could cause malfunction or damage. Ensure the power cord is not damaged and is properly grounded.
Keep the device and its accessories out of reach of young children. Avoid dropping or subjecting the unit to strong impacts. Disconnect the power supply when not in use for extended periods.
Cleaning the P-touch D200
To maintain optimal performance, regularly clean your Brother P-touch PT-D200. Disconnect the power before cleaning. Use a soft, dry cloth to wipe the exterior casing, removing dust and debris. Avoid using abrasive cleaners, solvents, or excessive moisture, as these can damage the unit.
For the print head, gently wipe it with a clean, dry cotton swab after each tape roll change. This removes any adhesive residue. The keyboard can be cleaned with a slightly dampened cloth, ensuring no liquid enters the device.
Inspect the tape path for any accumulated debris and carefully remove it. Regular cleaning ensures clear, consistent label printing.
Recommended Operating Temperatures
To ensure reliable operation and prevent damage to your Brother P-touch PT-D200, adhere to the recommended operating temperatures. The ideal temperature range for optimal performance is between 50°F (10°C) and 95°F (35°C).
Avoid using the label maker in environments outside this range, such as direct sunlight, near heat sources, or in extremely cold conditions.
Operating outside the specified temperature range may affect print quality, cause tape jams, or potentially damage internal components. Proper temperature control contributes to the longevity and consistent functionality of your P-touch device.