
Goodman air conditioners are reliable‚ but issues can arise. Timely troubleshooting is key to preventing breakdowns. This guide helps identify common problems and provides DIY solutions.
Why Troubleshooting Is Important
Troubleshooting your Goodman AC is crucial for maintaining efficiency‚ safety‚ and performance; Identifying issues early prevents minor problems from escalating into costly repairs. It ensures your system runs smoothly‚ saving energy and extending its lifespan. Regular checks also help avoid safety hazards like electrical faults or fire risks. By addressing issues promptly‚ you can enjoy consistent cooling and reduce unexpected breakdowns. Troubleshooting empowers homeowners to diagnose problems confidently‚ whether it’s a blown fuse‚ faulty capacitor‚ or loose connections. This proactive approach not only saves money but also enhances your understanding of how your system works‚ making future maintenance easier and more effective.

Tools and Materials Needed for Troubleshooting
Effective troubleshooting requires the right tools. A multimeter is essential for measuring voltage and resistance. Screwdrivers (both flathead and Phillips) are needed for accessing components. Pliers can help with wires or small parts. A capacitor tester is crucial for diagnosing faulty capacitors. A circuit breaker or fuse checker ensures electrical safety. Work gloves and safety goggles protect during repairs. These tools help identify and fix issues efficiently‚ ensuring safety and effectiveness.

Common Issues with Goodman Air Conditioners
Goodman ACs often face issues like not turning on‚ insufficient cooling‚ strange noises‚ or water leaks. These problems can stem from faulty capacitors‚ loose screws‚ or electrical issues.
AC Not Turning On
If your Goodman AC isn’t turning on‚ start by checking the fuse box or circuit breaker for blown fuses or tripped switches. Ensure the thermostat is set correctly and the batteries are fresh. Verify that the 3-amp fuse inside the unit is intact. A faulty capacitor or contactor could also prevent the unit from starting. Check for loose screws‚ as vibrations may cause connections to weaken over time. If the issue persists‚ inspect the wiring for damage or corrosion. Replacing the capacitor or contactor may resolve the problem. If none of these steps work‚ it may be time to consult a professional technician to diagnose deeper electrical or component failures.
Insufficient Cooling or Poor Airflow
If your Goodman AC isn’t cooling properly or has weak airflow‚ start by inspecting the air filter. A dirty or incorrectly sized filter can significantly reduce efficiency. Clean or replace the filter as needed. Next‚ check the condenser coils for dirt or debris‚ as blocked coils can impede cooling performance. Ensure the evaporator coil is clean and free of ice buildup‚ which may indicate low refrigerant levels or poor airflow. Inspect ducts for leaks or damage‚ as gaps can cause cool air to escape. Also‚ verify that the thermostat is set correctly and functioning properly. If issues persist‚ consider professional assistance to address potential refrigerant leaks or system sizing problems.
Strange Noises from the Unit
Strange noises from your Goodman AC can indicate underlying issues. Common culprits include loose screws‚ faulty fan motors‚ or worn-out bearings. Start by turning off the unit and inspecting for loose screws‚ tightening them if necessary. If the noise persists‚ check the fan motor and blades for damage or obstructions. A rattling sound may signal a failing compressor or refrigerant leak‚ while a hissing noise could indicate escaping refrigerant. Humming or buzzing might point to a malfunctioning capacitor or contactor. Ensure the condenser coil is clean‚ as debris can cause unusual sounds. If the issue remains unresolved after these checks‚ it’s best to consult a professional to prevent further damage.
Water Leaks or Excessive Condensation
Water leaks or excessive condensation in your Goodman AC often point to drainage issues or refrigerant problems. A clogged condensate drain line is a common culprit‚ causing water to accumulate and leak. Check the drain line for blockages‚ such as dirt or algae‚ and ensure it’s properly sloped. Low refrigerant levels can also lead to excessive condensation‚ as the system works harder to cool. Inspect the refrigerant lines for leaks or damage. If the condenser coil is dirty‚ it can reduce airflow‚ causing condensation buildup. Clean the coil gently with a garden hose. If the issue persists‚ a professional should inspect for internal system leaks or drainage system malfunctions to prevent water damage or mold growth.

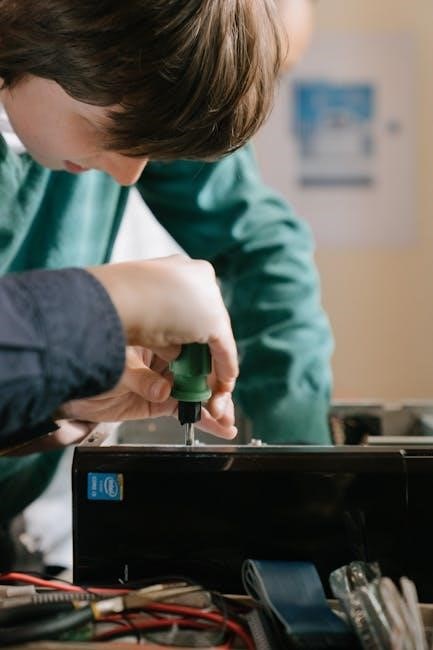
Checking and Replacing the Capacitor
A faulty capacitor is a common issue in Goodman ACs. Use a multimeter to test for capacitance and voltage. Replace it if readings are off specifications to ensure proper operation.
How to Identify a Faulty Capacitor
A faulty capacitor can cause your Goodman AC to malfunction. Look for signs like bulging‚ leaking‚ or a burnt smell. Use a multimeter to measure capacitance and voltage. If readings deviate from the specified values‚ the capacitor is faulty. Ensure the unit is off before testing. Always discharge the capacitor safely to avoid shocks. A bad capacitor can prevent the compressor or fan motor from starting‚ leading to poor cooling or complete system shutdown. Replacing it promptly ensures optimal performance and prevents further damage to other components. Regular inspections can help identify issues early‚ saving time and money.
Steps to Replace the Capacitor Safely
To replace the capacitor safely‚ first‚ turn off the power to the AC unit at the circuit breaker. Discharge the capacitor using a resistor or wait 30 minutes to ensure it’s safe. Remove the wires from the old capacitor and gently pull it out. Install the new capacitor‚ ensuring it’s the correct voltage and type. Reconnect the wires securely. Use a multimeter to verify proper installation; If unsure‚ consult a professional technician to avoid risks. Always follow safety precautions to prevent electrical shocks or damage to the system. Proper replacement ensures the AC runs efficiently and avoids further component failure.
Troubleshooting Electrical Components
Troubleshooting electrical components involves checking fuses‚ circuit breakers‚ and relays. Ensure all connections are secure and test for voltage using a multimeter to identify faults.
How to Check Fuses and Circuit Breakers
Start by locating your home’s fuse box or circuit breaker panel. Switch off the AC unit at the thermostat and unplug it for safety. Open the panel and inspect the circuit breaker linked to your Goodman AC. If it’s tripped‚ reset it. For fuses‚ remove the appropriate fuse and check for blown filaments. Replace it with a matching amp rating. If the issue persists‚ inspect the unit’s internal fuses using a multimeter. Always turn off power before handling electrical components. If unsure‚ consult a professional to avoid hazards. Regular checks can prevent unexpected breakdowns and ensure smooth operation.
Understanding Contactor and Relay Issues
Contactors and relays are crucial for controlling power flow in Goodman AC units. A faulty contactor can prevent the compressor or fan motor from starting. Look for signs like clicking noises‚ stuck contacts‚ or burn marks. Use a multimeter to test for continuity and voltage. If the contactor fails‚ replace it with an exact model. Relays‚ often part of the control board‚ can also malfunction‚ causing similar issues. Check the thermostat’s 24VAC signal to ensure it’s activating the relay. If problems persist‚ professional diagnosis may be needed. Regular inspection can help identify worn contacts early‚ preventing costly repairs and ensuring efficient cooling performance throughout the season. Always disconnect power before servicing these components to avoid safety risks.

Advanced Troubleshooting with a Multimeter
A multimeter is essential for diagnosing electrical issues in Goodman ACs. Use it to measure voltage‚ resistance‚ and continuity to identify faulty wiring or components efficiently.
Measuring Voltage and Resistance
Using a multimeter is crucial for diagnosing electrical issues in your Goodman AC. Set the multimeter to DC or AC voltage‚ depending on the component. Measure the voltage at the capacitor‚ contactor‚ and compressor to ensure readings match the rated specifications. For resistance‚ test the fan motor and compressor windings; high or low readings indicate faults. Always turn off power and discharge capacitors before testing. Identify blown fuses or faulty wiring by checking continuity. Compare measurements to the unit’s schematic for accuracy. This step-by-step process helps pinpoint electrical issues efficiently‚ ensuring safe and effective troubleshooting.
Identifying Faulty Wiring or Connections

Faulty wiring or connections are common issues in Goodman AC systems. Start by visually inspecting wires for signs of damage‚ rust‚ or wear. Use a multimeter to test for continuity and voltage drops across connections. Check the thermostat wiring to ensure proper communication with the unit. Loose or corroded connections can prevent components like the compressor or fan motor from functioning. Measure resistance between wires to detect short circuits or open circuits. Always turn off power before testing. If you find disconnected or damaged wires‚ repair or replace them promptly. Faulty wiring can lead to safety hazards and system malfunctions‚ making it crucial to address these issues early.

Understanding Error Codes on Goodman AC Units
Goodman AC units display error codes to signal specific issues. These codes help diagnose problems like sensor malfunctions or compressor faults. Always refer to the user manual for code meanings.
Common Error Codes and Their Meanings
Goodman AC units use specific error codes to indicate issues. For example‚ code “E1” often signifies a problem with the electronic control system‚ while “E2” may point to a refrigerant leak. Code “E3” typically relates to sensor malfunctions‚ such as a faulty temperature sensor. Understanding these codes helps in identifying the root cause of the problem. Always refer to the user manual or manufacturer guidelines for accurate interpretations. Addressing these issues promptly can prevent further damage and ensure optimal performance. Regular maintenance and timely repairs are essential for extending the lifespan of your Goodman air conditioner. This guide provides detailed insights to help you decode and resolve common errors effectively.

Regular maintenance is crucial for optimal performance. Clean filters‚ check for loose screws‚ and inspect wiring connections. Schedule professional inspections annually to prevent unexpected issues.
Regular Maintenance to Avoid Future Issues
Regular maintenance is essential to ensure your Goodman AC operates efficiently and lasts longer. Start by replacing air filters monthly and cleaning the condenser coils annually. Check for loose screws and tighten them to prevent noise and vibrations. Inspect wiring connections for signs of wear or damage and ensure proper drainage to avoid water leaks. Schedule professional tune-ups annually to identify potential issues early. Keeping your unit well-maintained not only improves performance but also reduces energy bills and extends its lifespan. Refer to your unit’s manual for specific maintenance recommendations and consider investing in a maintenance agreement for routine checks.

When to Call a Professional Technician
If you encounter complex issues like persistent electrical faults‚ refrigerant leaks‚ or internal component failures‚ it’s best to call a licensed HVAC technician. DIY repairs can be risky‚ especially with high-voltage systems. A professional can safely diagnose and fix problems like faulty compressors‚ damaged coils‚ or malfunctioning thermostats; Additionally‚ if your AC unit is under warranty‚ hiring a certified technician ensures warranty validity. Don’t hesitate to seek expert help for severe or recurring issues to avoid further damage or safety hazards. Schedule a professional inspection if your unit is old or requires specialized tools for repairs.